- 14 of the Best Trail-Ready Mountain Bike Shoes - October 5, 2021
- Best Cycling Gloves: Protect Your Mitts! - January 2, 2020
- 13 Best Shred-Worthy Mountain Bike Gloves - September 29, 2019

Stages power meters are known for two things: bringing power meters into the budget range of the everyday cyclist, and gracing Team Sky’s Tour de France winning bikes.
But despite their endorsement from the pros, Stages haven’t totally dominated the power meter market. Issues with the reliability and accuracy of data, plus the waterproofing (or lack of) of the casing plagued earlier generations of meters, issues which Stages claim to have fixed with this year’s Gen 3 range.
Browse the range of Stages Cycling Generation 3 Power Meters available to purchase from CompetitiveCyclist.com.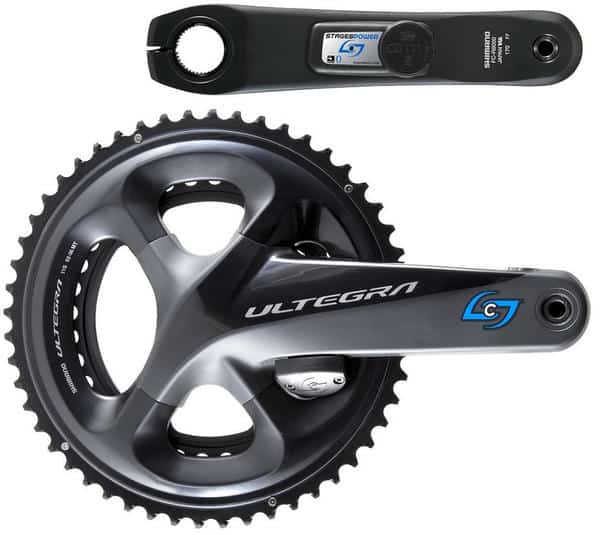
![]()
If you’re in the market for a power meter, here’s what you need to know…
Stages Gen 3 Features
Here’s the lowdown on the new Stages Gen 3 range:
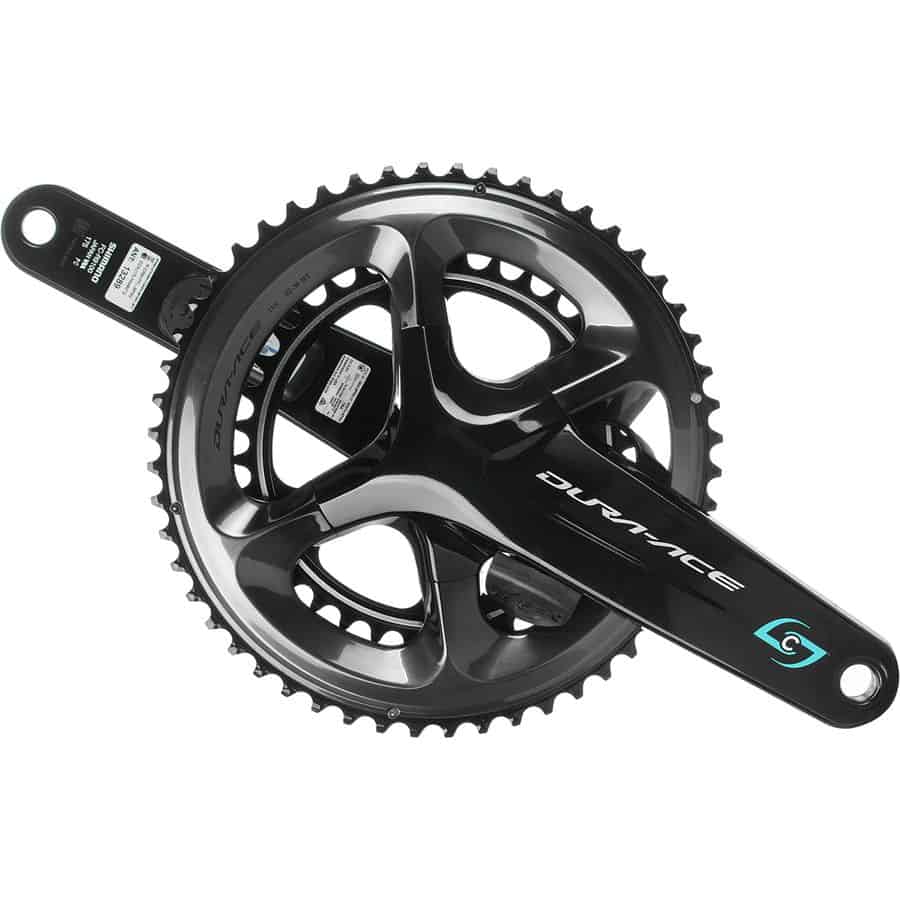
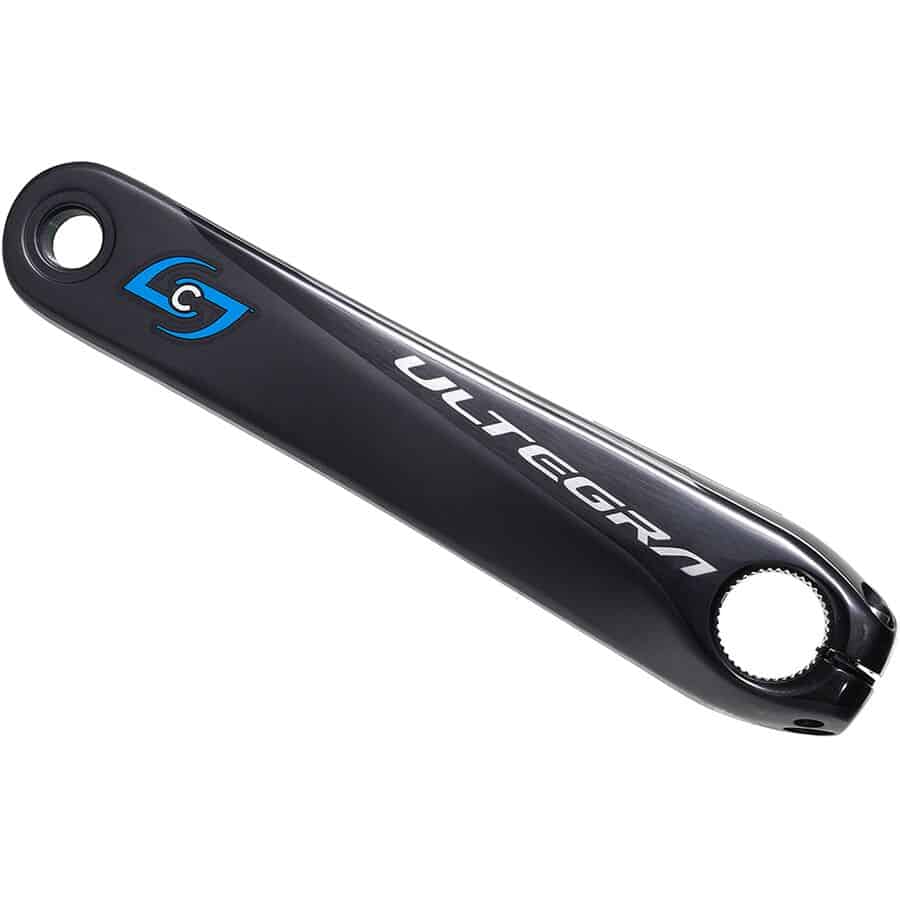
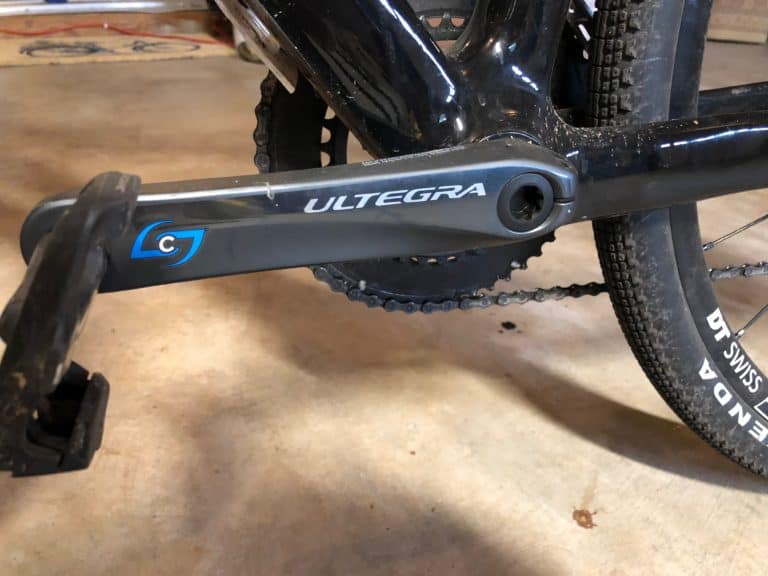
- Crank arm power meters – single sided meters are available for a range of cranksets, but the dual-sided Stages Power LR currently only comes with the Shimano Dura-Ace R9100 or the Ultegra R8000 crankset.
- Lightweight – the Stages Power L weighs in at 15g, while the LR meter adds just 35g to the base crankset weight
- ANT+ and Bluetooth Smart connectivity – the meters are compatible with almost all bike computers and smartphone apps, and firmware can be easily updated via Bluetooth
- Active Temperature Compensation – the meters will auto adjust for temperature changes on the move
- Updated accelerometer and gyroscope for improved accuracy
- Meters are individually calibrated to an accuracy of +/- 1.5% in all conditions
- 175+ hours battery life (they run on a replaceable CR2032 battery)
- LED battery indicator
There are plenty of great power meters on the market, but let’s face it, if you have a Dura-Ace 9100 group, you don’t want to run a third-party crank and part with those excellent shifting rings and stiffness of the 4-arm asymmetric design.
Finding time to train can be trying in a world of 9-to-5 work life, family, and long commutes —not to mention wanting to have a well-rounded existence between friends, hobbies, and fitness. This juggling act can make finding the hours to train trying,
What’s the Difference Between the Stages Gen 3 and Gen 2 Models?
From the outside, the only difference you’re likely to notice is a different label and the addition of a small LED light which lights up when the power meter comes on and gives an indication of battery life. A small, but useful, addition.
More significantly, the electronics inside the casing have had an upgrade, with new antennas that Stages claim offer a 6x improvement on data transmission strength. The accelerometer has been upgraded, and they’ve added a gyroscope for improved cadence resolution.
Stages also claim to have improved the housing to prevent the water ingress issues that have plagued previous models. You probably won’t notice the difference at a quick glance, but if you turn a power hose on it for a few seconds, the Gen 3 should survive the experience unscathed.
In addition to the traditional single-sided meters, there’s a new kid on the block with Stages’ first dual-sided power meter, the Stages Power LR.
Browse the range of Stages Cycling Generation 3 Power Meters available to purchase from CompetitiveCyclist.com.
![]()
Overall
The improved accuracy of the Gen 3 range makes it a no-brainer to buy the new improved version, rather than scouring the net to save a few bucks on the Gen 2 model. But is it worth paying to upgrade?
Although the dual-sided option is great, it might not suit everyone. If you already have a left-leg compatible model, you could save yourself some money by pairing the new Stages Power R with the older model to create a dual-sided system.
If you’re looking to invest in your first power meter and you want an affordable, high-quality model, the Stages Gen 3 range should definitely be on your list to consider.
Browse the range of Stages Cycling Generation 3 Power Meters available to purchase from CompetitiveCyclist.com.
![]()
GEN 3 Stages Power L ULTEGRA R8000

Pros
- great customer service
- great customer service
- can move Power L meters easily between compatible bikes
- good accuracy
- option for L/R data
Cons
- some users have extra reported issues with setup and dropouts in connectivity
- fitting the right-side meter takes a bit of time