- The Ultimate Guide to Women’s Specific Bikes - October 5, 2021
- Top Road Bikes Under $1000: Grab More Speed for Less Cash - October 5, 2021
- Get Fast! 8 Top Carbon Fiber Road Bikes Under $2,000 - October 5, 2021

One of the most important things to consider when buying a new bike is how it fits. If a bike is uncomfortable, I guarantee you won’t ride it much or worse, you’ll end up injured. How you’re positioned on the bike also determines how fast you’ll go.
A bike fit goes well beyond setting the bike seat height. Fortunately a good bike shop can get you started with the proper fit, but it’s important to remember that bike fit is dynamic, meaning it changes over time. Something as simple as gaining more upper body flexibility can change your cycling position. Here are a few simple at-home tweaks you can apply to ensure your bike fits well season-after season.
How to size a bike frame and why you must get it right
Choosing a bike is like buying a pair of pants. Each bike is unique to the individual who will be riding it. You can change out pretty most bike parts, but you can’t change out the frame, so be sure to buy the right size the first time. Do your research and get your body on as many different bikes to try as possible.
Still trying to decide where to begin? Start here and I’ll walk you through the buying process and point out a few common pitfalls to avoid.
Sizing a bike frame is no easy task. There is no one standard among manufacturers for how to measure and build a specific size bike frame. Some manufacturers have measurements such a small medium and large, While others will use numbers such as 50 or 52 to determine the size of the bike. Even among manufacturers, sizing can differ between models.
Bike companies also vary in how they measure each frame, so it’s always best to test ride a bike first, if possible. If you cannot do this, the next best thing is to use the fitting charts provided by each bike manufacturer. This will get you in the ballpark of where you need to be.
Bike Sizing Tips
One way to get a rough estimate is to compare the length of your inseam to the distance between the top of the seat tube and the center of the bottom bracket. This will help ensure you have enough standover height or basically that your crotch clears the top tube.

A method I’ve found to be more predictable is to go by the length of the top tube or effective top tube. This is the distance between the head tube and the seat post if the top tube is sloping (not straight). Or for a more traditional bike with a top tube that’s level and straight, you’ll measure the length of just the top tube. You can find more details on this from the late cycling guru Sheldon Brown.
The bottom line: If the top tube is too long, you’ll be overreaching on the bike and likely placing unecessary strain on your hands and knees. Too short and you’ll be sitting very upright. Find a bike with a frame size that fits well and then you have a margin of adjustments you can make to perfectly dial in the fit, making it specific to you.
How to do your own bike fit
After you find a frame that fits well, it’s important to set up the three contact points your body makes with the bikes: The handlebars, saddle and pedals.
The easiest way to perform a bike fit is to start with your bike in a trainer and enlist the help of a friend. Don’t have a trainer? You’ll need to find a way to position your bike so it’s level. Wear the shorts and shoes you will use for cycling.
1. Set the Seat Height
- Before you begin, ensure that your saddle is level (use a carpenter’s level).
- Ultimately you’ll want to achieve a position with a slight bend in your knees, approximately 30 degrees, as you pedal.
- Begin by sitting on the saddle and rest your foot so the heel is on the pedal. Your leg should be straight in this position.
- Now slide your foot back. When the ball of the foot drives into the pedal, your knees should be slightly bent.
- As you pedal, be sure your hips aren’t rocking. If they are, adjust the seat height until this resolves.
- For a mountain bike setup, you may want greater bend in the knees for moving over obstacles and moving in and out of the saddle. This all depends on the type of terrain you’re riding.
Related: Is Your Seat a Pain in the Butt? How to Choose the Best Road Bike Saddle
2. Set the Seat Fore and Aft
- For this step, you’ll need a plumb line or you can use a piece of string looped around a couple of washers.
- Pedal a few times and then stop with your crank arms parallel to the ground (this is not the position at the end of the pedal stroke, but rather the 3 o’clock position).
- Next place the string at the top of the knee cap and let the plumb line dangle down past your foot. Ideally the plumb line should line up with end of the crank arm.
- Use a hex key to adjust the saddle until your knees are in the optimal position.
- You can also adjust the saddle’s tilt, though making huge adjustments could indicate an ill-fitting saddle.
Keep your 4, 5 and 6mm bolts tight with just one tool. The 3-way hex wrenches steel construction will last through many uses while the soft-coated handle will allow better grip while using it.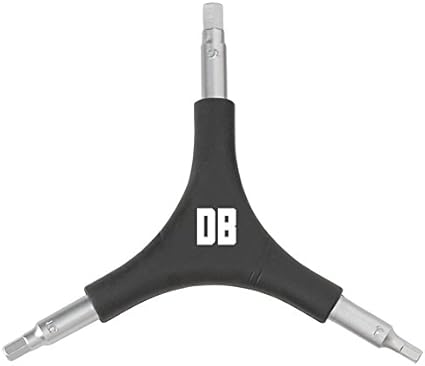
![]()
Related: Treat and Prevent Saddle Sores: 6 Simple Remedies
Arm yourself with the right tools and you’ll always be ready to wrench your bike. Here’s my quick guide to essential bike tools.
3. Adjust the Handlebars and Stem
- If you need to adjust the bike’s handlebars, start by adjusting the stem.
- The length of the stem will determine how upright you are on the bike as well as the bike’s handling and performance. A lower, more stretched out position will place more pressure on the hands and can cause neck and low back discomfort. Unless you’re planning to race, an aggressive position isn’t necessary.
- If you need to make an adjustment, you have two choice: You can either swap the stem out for a different length and/or height or you can try a quick fix by flipping your existing stem.
- To flip or replace your stem, use a hex wrench to unscrew the top cap off the steerer tube. Then loosen the stem bolts and the stem will slide off. Remove the faceplate bolts around the handlebar and then either flip or replace the stem.
- If you’re working with carbon fiber parts, it’s a good idea to use a torque wrench.
Simple and easy to use, this torque wrench is used for correct tightening of bolts on frame and components to recommended torque values for safety and performance.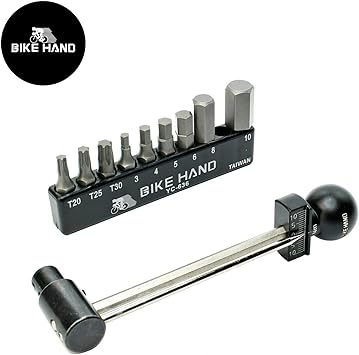
![]()
4. Pedals
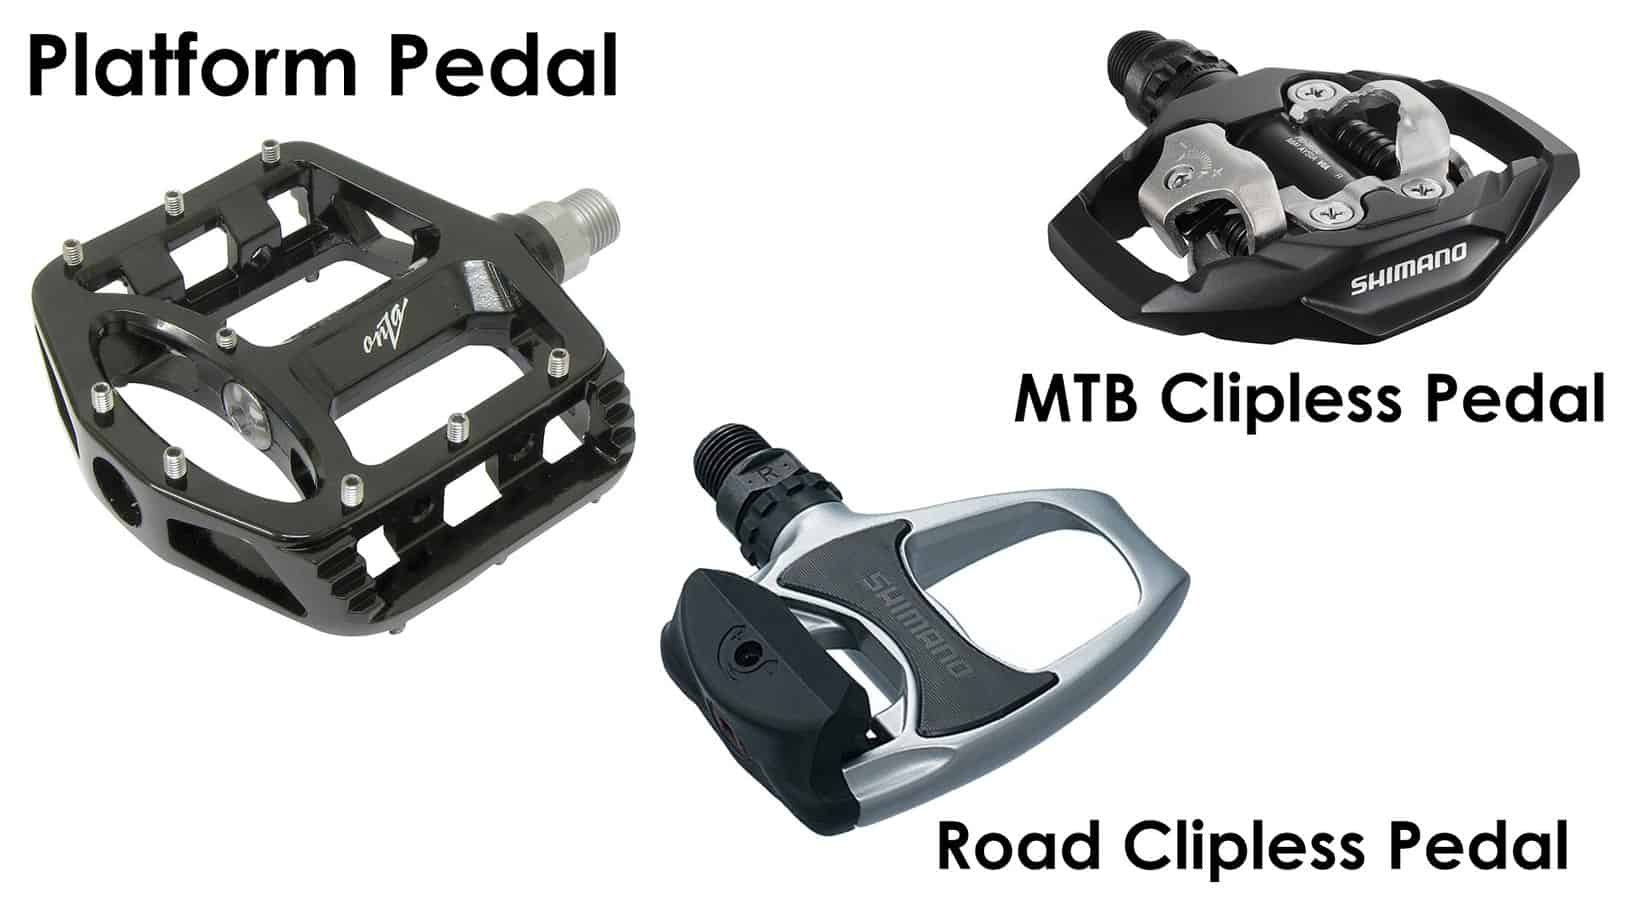
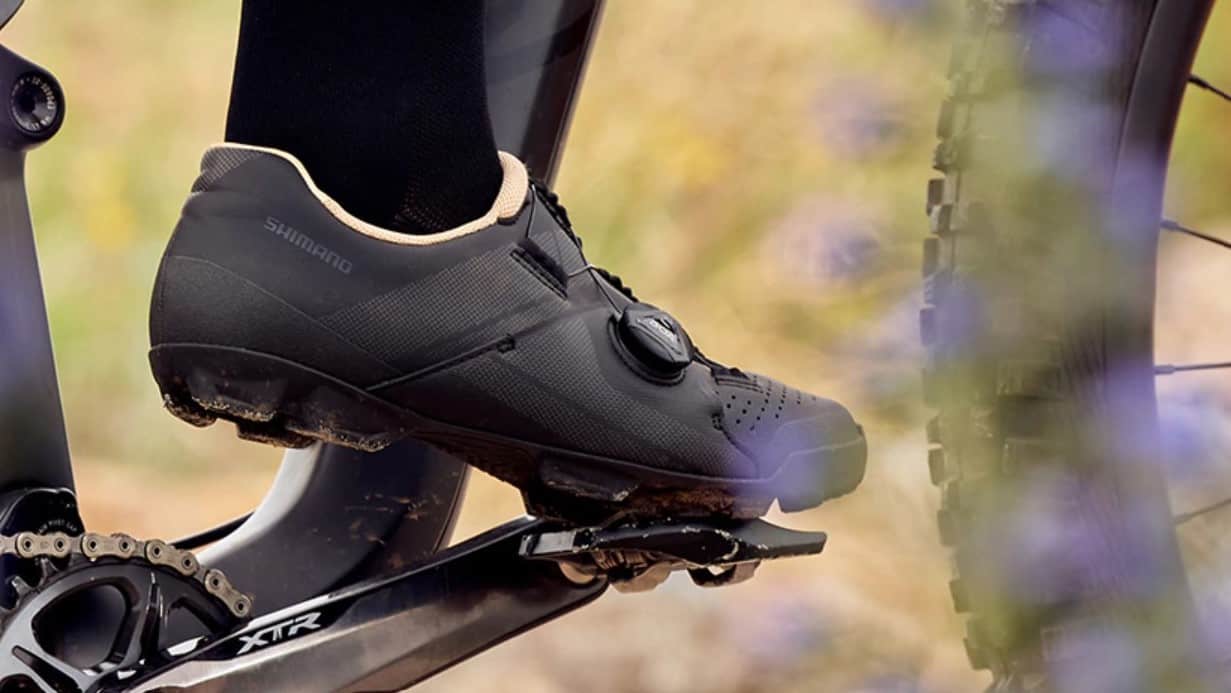
- The last point of contact is between your feet and the pedals. There are plenty of options here as well. You can choose between clipless, toe clips or flat pedals. If you’re an absolute beginner, save yourself the learning curve and just get used to riding a bike with flat pedals. You can always upgrade later.
- Clipless pedals require you to wear special cycling shoes with cleats attached to the bottom. This cleat clips into the pedal, securely holding your foot in place. If you’ve ever banged your shin on a bike pedal, you’ll appreciate the idea of clipless pedals. Plus they help transfer power efficiently from your body to the bike. They do require some patience, as there’s a bit of a learning curve.
- When mounting cleats, the ball of your foot should be directly over the pedal spindle. The cleats should be positioned so you have a neutral stance. A professional fitter can help position them properly the first time.
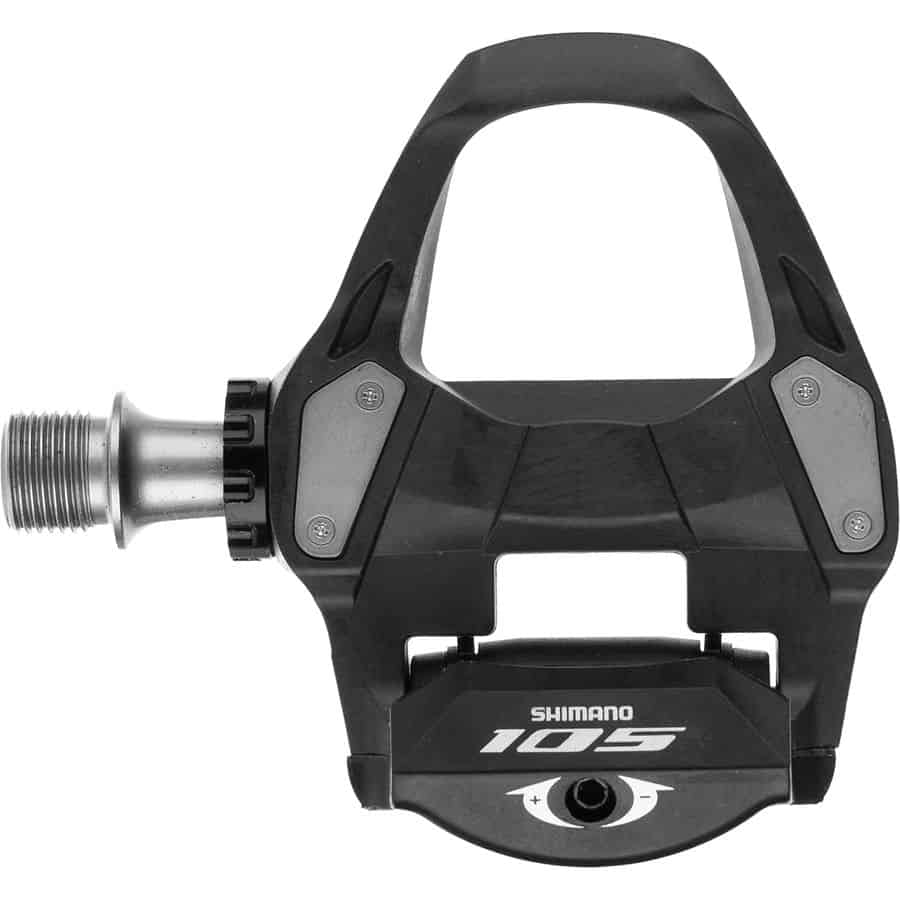
Renowned for its strong and durable pedals, this R7000 model brings the weight savings of carbon to the party, all at a price you can actually live with.
Find the latest Men and Women's Road Bike Shoes for sale at Competitive Cyclist. Shop great deals on premium cycling brands.
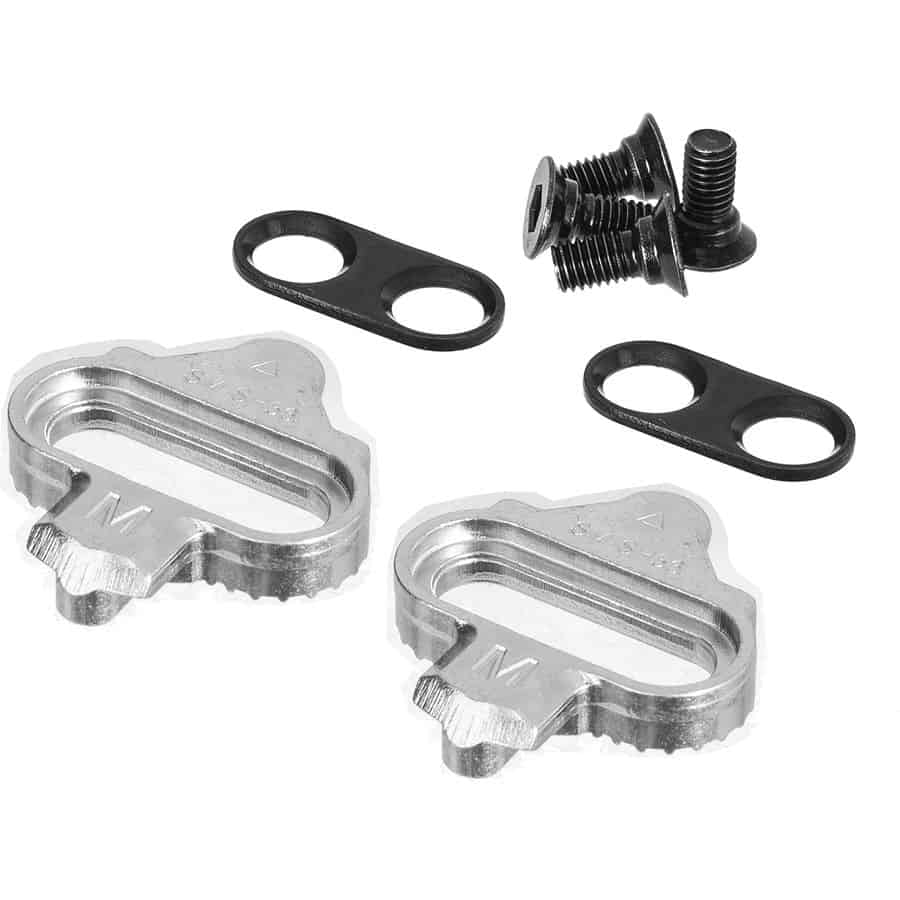
Clip-in and get going with the Shimano SH56 SPD Cleat Set. Designed to pair with Shimano SPD pedals, these cleats are multi-release so you can clip out by twisting your foot to either the inside or outside of the pedal.
Complete Guide to Clipless Pedals: How to Get Started Now
Conclusion
It’s important to take your time when shopping for a bicycle. Find a shop you feel comfortable with and test ride as many bikes as possible. Don’t be afraid to ask questions.
When buying a new bike, getting the size correct from the beginning is crucial. While you can swap out components to tweak the fit, you absolutely need to start off with a well-fitting bike frame. Then, as you grow as a rider, you can swap parts or change the fit to accommodate different riding styles.
Need extra help? Calculate your bike fit through this Calculator from Competitive Cyclist.
Nothing is really more important for creating a great cycling experience than matching yourself---your body, your goals, and your dreams---to the right bike.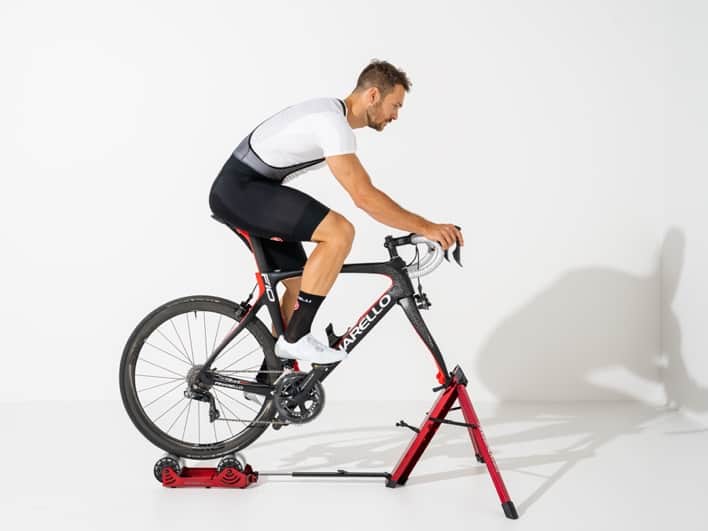
![]()